Thursday, 1 September 2011

Beadnell and old friends

Yesterday we met up with Anne and Grant, good friends we'd not seen for several years.  They were holidaying in their caravan in Beadnell, Northumberland.  As it is closer to us than there home in Cheshire we decided to make a day of it and visit them.  We took Buster with us as we couldn't get a dog sitter but he was very well behaved all day I'm pleased to say.

We took the direct route up the motorway for quickness but stopped at Amble to let all of us stretch our legs and do the necessary.


Buster was disappointed that the tide was out and we wouldn't let him play in the mud.  That's Warkworth Castle in the top photo, not a very good picture though.

We arrived a lunchtime and Anne and Grant our friends insisted on taking us for a birthday lunch in Seahouses.  As we had Buster lunch had to be in the beer garden but that wa fine as it was sunny and the garden backed onto the harbour.  We also had a wonderful view of the Farne Isles.


Later  we went back to Beadnell and finally allow Buster a paddle and play in the sea.  He loves water, so long as he doesn't involve soap.  He spent ages picking up seaweed from the water and depositing it on the rocks.  I think he must have been a retriever in a previous life.


He really did not want to come out but we had to set off home.

We took the long way home via Alnwick, Rothbury across the moors to come out just above Hadrian's Wall.  The heather was beautiful and we stopped to pick a couple of  pieces and let Buster stretch his legs again.


All three of us really enjoyed our day out and apparently we'd worn Buster out as he took himself off to bed at 7:30pm and was difficult to get out of bed this morning - just like us.

Tuesday, 30 August 2011

Birthday presents

I forgot to say yesterday that Saturday was my birthday and also Keith's - yes we share a birthday much to the disgust of the boys.   My Tilda book from which I made the dolls was a birthday present from Keith I bought him some woodturning tools.  I promised I'd post a photo of the second Tilda doll, the one for my sister and here it is (well actually its both of them).

I'm really not good with faces definitely need more practise but the real Tilda's only have two eyes and a bit of blusher.  Don't ask me how I managed to get the legs different lengths from the same pattern, I just don't know but it doesn't seem to matter.   I might add shoes but haven't made my mind up.   The instructions for making the dolls and clothes are not sequential and I found I had to jump about a bit to get it together.  You need to read all the instructions for all the dolls before you start to make one.  I didn't and ended up trying to sew the bathing dress onto a doll with arms.  Whereas if I'd followed the instructions for a different doll I would have know to sew the arms on last. I'm more used to making dolls with clothes that come off, these don't they form part of the body or are sewn onto the body.  I didn't find it difficult turning the legs and arms but stuffing them was a challenge.  Still we got there in the end and my sister is delighted with hers.  She is going to sit on top of her cookery books in the kitchen.  Mine will keep me company in my sewing room.

Now as I said earlier it was birthday time on Saturday and the family took Keith and I out to lunch on Sunday.   They took us to a local inn for a carvery the meal was so large none of us could finish it and pud was definitely not even considered.  It took both of us until the next day to feel hungry again.

Keith also bought me from the Quilt Museum these goodies while I was looking at the exhibits and I thought he was sitting in the Members kitchen drinking tea.
 I haven't read the books yet, just browsed through them but I know I'm going to enjoy them.  And look at the lovely threads  I was really surprised and delighted with them especially as we said we weren't going to buy any presents other than those we'd already had.  I too cheated though and bought him a 3D Nintendo.

He also made me this sweet litte vase for a single flower (there is a glass tube inside to hold water).


In addition, because it was a special - one of those big O's birthdays for me, a basket of flowers and more flowers from the family.   These are just some of them I've now ran out of vases to put them in and they are standing in a bucket.   Who was a lucky girl then....

Monday, 29 August 2011

Sorry its been so long

Again not sure where the time has gone.  My son and his finance' have moved into their first home during my 'off' time and naturally we've been helping them.  We went to see the exhbition at the Quilt Museum in  York and I really loved the "Made in Yorkshire" exhibits.  Pity you aren't allowed to take photos.  What else have I done while not talking to you well I've finished six hexagon flowers.

These are for the Hex Along (see button on side bar) at Lily's Quilts I thought I'd join in.  The centre hexies are supposed to have more of a curve on them, instead they look a bit like baby blocks.  Oh well must do better next time.

Three of us decided to make a bird from the 'Artful Bird' book and mine was a Raptor or at least it was supposed to be.


 He's sat on my windowsill frightening the moths away.

I've also been making a couple of Tilda dolls, finished one and just got the face to put on the second one which is for my sister.

 I got the book for my birthday, along with other things its this one and the one for my sister is in a bathing dress.  I'll photograph it tomorrow if I get the chance.

I've decided my 9pm curfew project (9pm being the time I usually give up sewing and Keith gives up his woodturning to actually sit and talk to each other) will be a miniture quilt.   I saw the pattern in this month's Magic Patch and is based on foundation blocks.  Its a while since I did any foundation work and as all the design side has been done for me I can just sit and sew.  Although knowing me I will probably change something.

I've started a new challenge over at Stitching Fingers Surface Design group which was started by Margaret Ramsay some time back.   The challenge is to make a wallhanging, one block a month using a different technique in each block and post a photo at the beginning of the following month.   At the end of which we should have enough blocks to make a small wallhanging.  You are welcome to come and join us.

Friday, 12 August 2011

Last of the postcard swaps

My last two Oriental Images have arrived from Sue and Lis which I'll show below.  I'm taking a break from swapping for a few months to catch up with Xmas bits and bobs and to do other textile things.  I want to do more digital imagery and some more digitizing, maybe both together who knows.

For my curfew time I've joined the Hexalong at Lily's Quilts which you can see what its all about from here or from the button on my sidebare.   I usually stop whatever I'm doing around 9pm and join dh for the rest of the evening, otherwise we are in danger of not seeing each other as we are both in our different craft areas.   So far I've only done plain old hexies but I did try to disect one of the hexies to create a sort of curved baby block only I haven't really made enough of a curve.  I've not taken any photos of my hexies so far but will tomorrow and post them later.  You can all then have a good laugh at my efforts.  Its eons since I made any hexagons but I downloaded the grid paper from Lily's blog.

 Oriental fan from Sue Wild and
Kimono from Lis Harwood.  Lis's Kimono comes off the card and can be used as a brooch or used somewhere else such as a bag.  

I've been busy buying first Leah Day's "From Feathers to Flames" book which can be downloaded and which for this week is reduced.  Quilting Arts also had their 2010 Gift book on offer for 1 dime (7p) but I can't find the link again, think I've deleted it in error.

Got to go, fish and chips are ready, speak soon.

Wednesday, 10 August 2011

Inchies Tutorial

Okay, here we go, I've not done this before so I hope everyone understands how I made the inchies once I've finished....

My software is Bernina Artista V5 (can't justify the cost of an upgrade).   This is not the definitely way of making inchies but to me its the easiest.  If you have another software make I'm sure there will be something very similar so this tutorial can be used by you.

Open up a new screen and set your hoop size (I used a large one as I wanted to sew out as many inchies as I could get in one hooping).  Set your grid pattern, I made mine 1" so I could draw out the inchies easily.

Select 'fill' and choose which type pattern you want inside your inchies and click on the rectangular tool (highlighted in orange on the left hand side).

Click on the Object Properties page (last in the orange block on the top bar) and select the pattern you want inside your inchies.   There are lots to choose from and you can alter the size of the pattern by changing some of the settings - play with them.   Click 'apply and ok'.    Note: make sure the rectangle box is still selected, if not select it again, sometimes it clears and you don't realise its not active.


Draw a square by using the grid lines.   To do this click your mouse point in the corner of one of the grid squares, hold the shift key down and pull your mouse diagonally until the square covers the grid lines.  Let go, press enter and your square now has the pattern you chose inside it.


Next stage is to put a border round it so that the whole thing doesn't fall to pieces if you sew it out on a soluble fabric, ask me how I know! 

This time change the stitch to 'Outline' and select satin stitch, change the colour so you can see whats happening.  Go to the Object Properties page again and change the width of the satin stitch to a small one.  I used 0.10in but you can choose whatever you think appropriate.   Click OK and draw a box round your pattern square by clicking your mouse in the top left corner and pulling your mouse diagonally until you reach the opposite corner.  Press enter and your inchies now have a satin stitch border round them.

At this point you have a choice.  If you want your inchies to sew out as one piece, ie all the same colour then you need to group the two squares.  To do this press Ctrl A (to select all) and press the group key which is (on my software) at the bottom of the screen 1st one on the left.

If you would like your inchies to have a different coloured border then just save the file and the software will stop once the pattern has been sewn out ready for you to change the colour of the border.
Save your finished inchy, I've saved mine to the usb stick but you can save them directly to a folder if you wish.  I forgot to take a screen shot of the finished inchy but you can see what it looked like with the border from this save screen.

I repeated the process to make enough inchies to fit into my hoop then grouped them together and saved as one file.
Have fun and I hope you could follow the tutorial.  

Friday, 5 August 2011

Treasure box finished

My last swap for a while with the Surface Design group is a box for Deb Cragan in Australia. I've decided to dramatically decrease the amount of swaps I do so I can have more time to play and experiment and hopefully do more design work.

First I created the fabric for the box by fmeing in various threads, including some thicker threads in the bobbin.   The background was a piece of paper fabric which I'd made some time ago and liked the colours.  This was covered with a sheer fabric before I began to sew.  Once I was happy that there was enough thread play on the piece I took a heat gun to it to create more texture.

Next I digitised some 'inchies' using Bernina V5 software and sewed them out onto soluble fabric covered with iridescent film.  I wanted the inchies to have a gleam of treasure.  These are very simple to make and doesn't need digitising skills to create them.   If anyone is interested I'll show you how I made them.

Once I'd sewn out a hoopful I separated them and washed out the sabiliser.  I quite liked them when they were finished and I might make some more later.  Not sure what I'll do with them but I did think they would make a bracelet or a cuff if beads were interspersed between the inchies.

I added some beaded beads I'd made earlier and some beads in toning values to the inchies and this was my treasure for Deb.
 I created a cardboard template for the box.  I had to keep adjusting it so that all the sides met up  properly.  Once I'd got a template I liked it was used to cut out the fabric I'd made earlier.  I satin stitched round all the pieces then sewed them together to form the box.  It was a treasure box so I put a few hot fix gems on the top before closing the lid with a piece of velcro.  The latter was intended to keep the box shut and stop the 'treasurers' from falling out en-route to Australia.
 

Monday, 1 August 2011

Fountains Abbey

The day was beautiful, sunny but not too humid and on arrival at Fountains Abbey we discovered that it was a 'medieval' weekend.A Medieval camp had been set up on the Abbey Green with all sorts of local skills (medieval times) being demonstrated.  Keith was very interested in the weaponry and was shown how a cross bow was made, the different types and uses of bolts (or quarrels) and much to his delight was allowed to handle one.   There were people spinning, weaving, making chain mail as well as brewing barley beer (none to test though).  In the middle was the camp fire over which several people were slaving away making the camps evening meal.  It looked very appetising and we asked if we could join in but health and safety rules don't allow for visitors.  Pity.   Later in the afternoon there was dancing.  At this point I tried to insert a video I'd taken of the dancing but Blogger was taking so long I thought it might have crashed and cancelled it.  I'm posting photos instead.


Fountains Abbey is at the bottom of a valley and all you can see from the top is the top of the Abbey tower.


The walk down is fairly steep but when you come to see was small but really exciting and I thoroughly enjoyed it.  Pity though that photos weren't allowed.  The Focus group had all previously taken photos, drawings etc of the abbey to use as the source for their work.  It was surprising how different people approach the same subject.  The exhibition was entitled "Focus on Fountains" and many of the pieces were based on the abbey's arche.   I hope to use my photos to do something creative later.


Friday, 29 July 2011

Oriental Image postcards

It's been a strange week, I've been busy but there's little to show for it except this set of cards for my version of Oriental Images. 

Omiyage means 'gift' and my Omiyage is  loosely attached to the card.   She can be taken off and by opening  up the back seam and filling it with rice turned into a small paper weight or key fob.  I hope the recipients enjoy her.

I've received four Oriental cards from the BQLPC group this week.


All very different images, Sunrise over the Mountain from Jan, Sashiko quilting from Sue, Bonzai from Alice and a wonderful Geisha from Carole.

I've decided to limit my card swaps for the foreseeable future, sadly postage is beginning to hurt a bit when I have several to post overseas.   I have one box to make for Debs in Australia and after that I hope to concentrate a bit more on digital art and quilting with the odd UK swap to keep my hand in.

I'm off to Fountains Abbey tomorrow to see the Textile Art show, which finishes on Sunday.  I hope to take some photos and perhaps incorporate them into journal pages.

Sunday, 24 July 2011

Painted hands, painted nails

Why is it that despite wearing rubber gloves I still get paint all over my hands and nails?  Answer: because I'm stupid enough to take off the gloves when washing the plates, brushes and rollers.

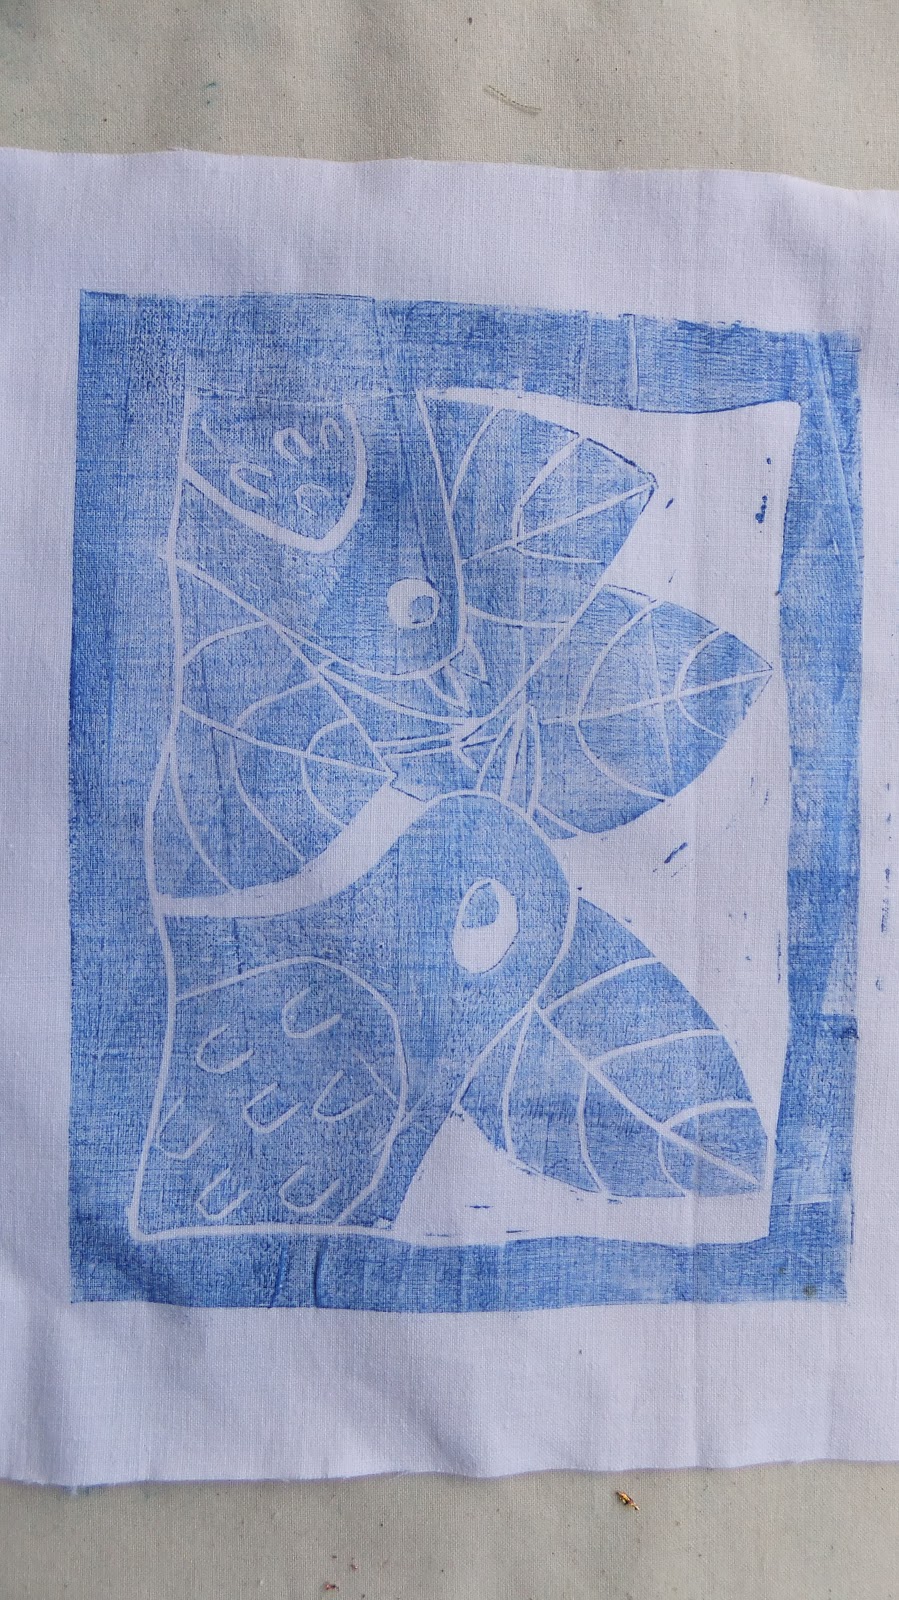
Sewing has gone out of the window recently as I've had the urge to create lino blocks.    I love stylized plants and lowers and recently bought Angie Lewin's book "Plants and Places".   It gave me the source and inspiration to create lino blocks of stylized grasse.   First I tried my hand at drawing a sun, and clover and plantains and carving out a negative block.  However, when I printed it out I thought there was too much paint and not enough detail.

So I tried to create a positive lino block by stamping the negative block onto another piece of lino and removed all the blue ink.   It took me much longer than I anticipated but I like the effect.  Some of the plant details got lost in the cutting as I found it too difficult to leave tiny spikey bits without cutting off the tips.

This piece started off as seed heads with a view to making something for the EG's 'Sewing a Golden Seam' challeng.  Or alternatively as an overstamp for one of the pieces of screen printed fabrics I did at Summer School.  Not sure now I've finished it what I'll actually do with it - any ideas?

I actually did this lino cut some time back but have only just printed it out onto fabric.  I think it would make a good book cover or ......?  Alternatively I could mount the block onto a canvas and use it as wall art.


Not sure why Blogger has turned these photos and I don't know of anyway to turn them the right way round now that they've been uploaded.

I've also been playing with Paintshop Pro and Photoshop but the PSP ones are on my laptop so I'll show them another time.   I've been concentrating on using adjustment layers together with 'effects' to see what can be done.  This one was a soft light adjustment, rainbow gradient that I created and reduced the opacity to 50% and gave it a soft plastic filter. 


This one was uses a photo a rose, gradient filter and a photo of Fountains Abby as a displacement map
 Got lost in this one and am not sure what steps I took.   Apart from framing two layers and using the buttonise filter on both together with dropped shadows.   I was aiming for one of those plaster plaques effects that were all the rage many years ago.   I know I overlayed two gradients and a  photo of lupins up against the shed in our back garden.  Apart from that sorry not sure what I did.  It was getting late and I was watching a film at the same time.

As for the state of our kitchen, it is all finished, clean and shiney (well almost shiney) and I can now get to the front door without feeling like I've just climbed Everest.  Living room is the next one to tackle but I've seen the price of wallpaper so I'm going to do the cheap and cheerful and test out the steam cleaner on the walls.   If it looks okay well it'll do another year, if not Keith will have to open his wallet and let the moths out.