http://www.youtube.com/user/CrazyShortcutQuilts#p/u/40/g14govA4pIM
I've been complaining for some time now, well ever since my 830 wouldn't fit in my Horn cabinet, that I missed the flat sewing surface. Buying another cabinet capable of taking the larger, heavier machines was out of the question. So after we watched this video we made a quick trip to B&Q and Wilks for the materials and this is the result.
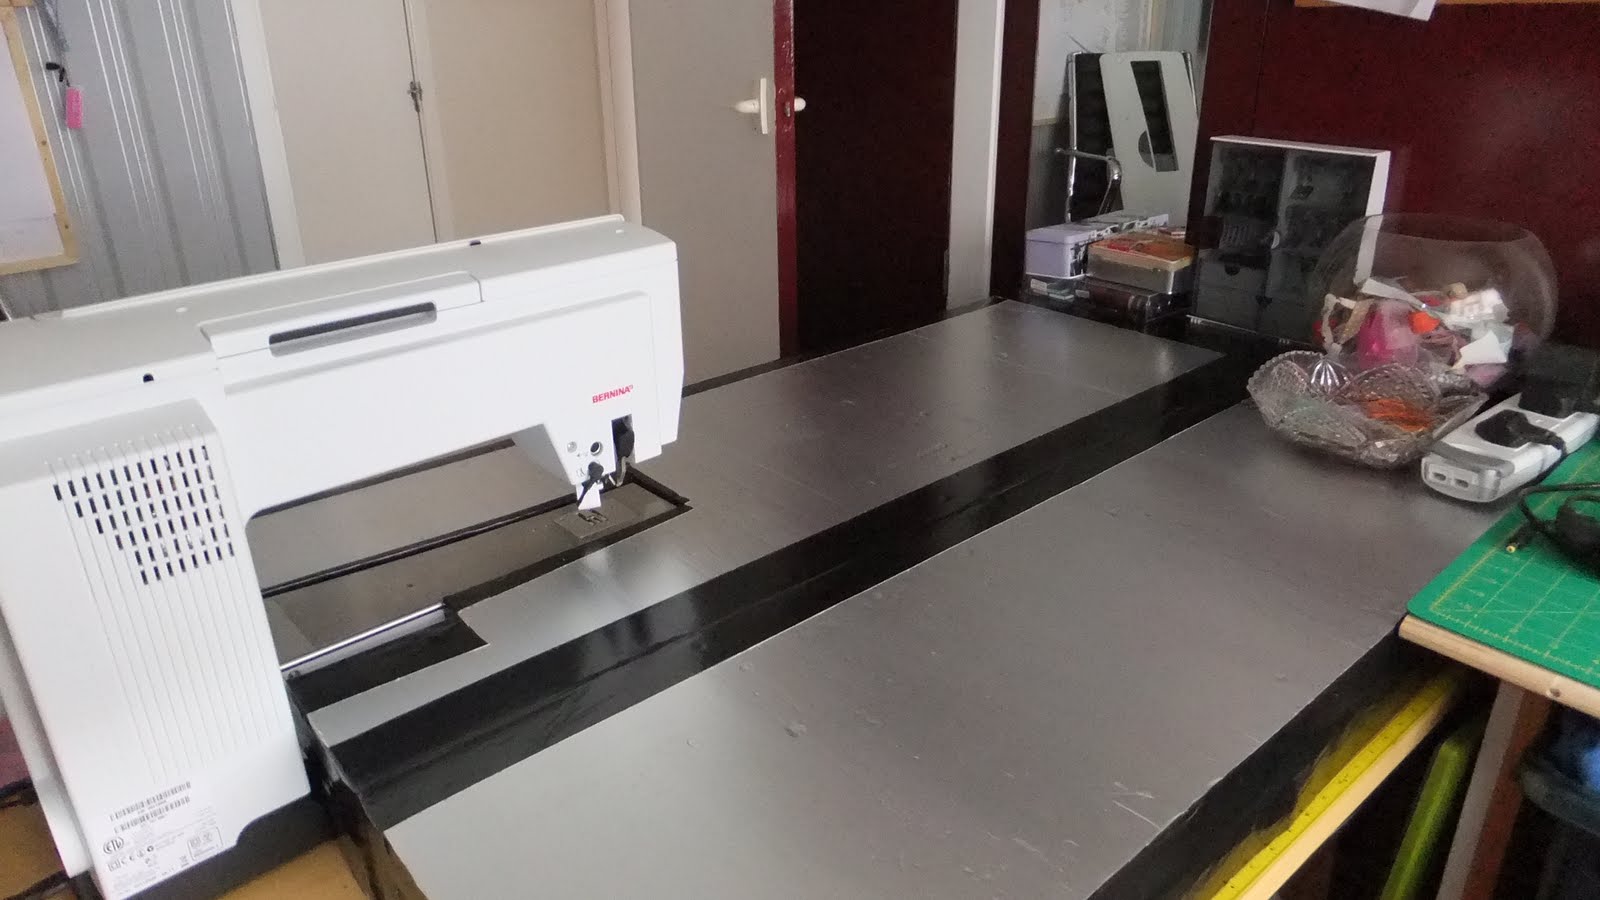
Table as seen from the back, notice we have left enough room for ventilation. Also we couldn't get the wider insulation into the car so had to settle for smaller blocks taped together with gaffer tape.


We had to use four insulation boards in all, two on the bottom and two on the top. Drawing round the machine for the base boards and round the machine arm for the top boards. The insulation foam is easy to cut with a serated knife but you have to remember when you draw out the pattern which way is the top!! We nearly cut the arm piece with the curve going the wrong way!! It's very sturdy but light and can easily be removed and propped up somewhere else when I want to use the embroidery unit.
I covered the whole table with heavy duty plastic that I'd bought some time back to make bags etc. I cut a hole where the needle and feed dogs went and was surprised to find the plastic stayed in place and acted a bit like my Supreme Slider making it easy to free machine. I'm very pleased with the outcome, it may not look pretty but it works.
2 comments:
It looks great - you lucky thing :-)
very nice...im jealous :)
Post a Comment